How to make a ceramic Fig Leaf Tray
Get inspired by the beauty that surrounds you and experience the joy of hand building your own ceramic tray. Use a real leaf to make a stunning platter for your kitchen. We used a Fig Leaf since we have a Fig Tree just outside the studio with beautifully patterned large leaves.You can choose any leaf that you like as long as it’s large enough for a tray. Head out to your garden and look for unique shapes that you would like to preserve. Once you have the leaf, then it’s just a matter of using clay to mold it into a tray. Here is how to go about it:

Start by picking a leaf of your choice. When choosing a leaf, look for those which are still supple. Dry leaves will crumble and break and will not give you the desired results. The size of the leaf defines the size of your tray, so pick your leaf accordingly. The more patterns on the leaf you find, the more interesting your tray will look. Fig leaves generally have deep veins and give you a defined impression on the clay. If you are going to choose a different leaf, I suggest finding one with deeper veins so the embedded pattern is well displayed.

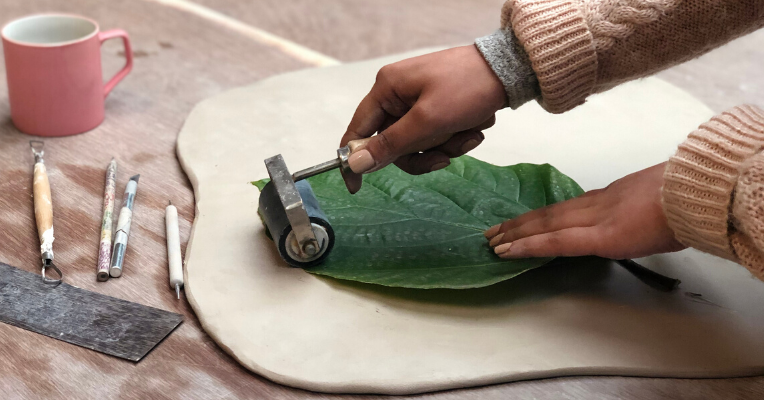
After wedging and preparing your clay for hand building, go ahead and roll it into a slab which is 7mm in thickness. It is important to keep the slab this thick to avoid cracks since the veins will embed deep into the clay. Place the leaf with veins facing down on the clay. Use a rolling pin or a brayer to gently press down on the leaf and imprint the details and the shape of the leaf into the clay.


Now use a sharp edge of a knife to cut out the shape leaving half an inch of border along the leaf. Leaving a half inch border is a choice, you can choose to cut along the border of the leaf directly. Here, the border gives us some room to shape the tray later on.

Shape the tray by placing sponges or newspaper along the sides of the slab to mold and curve it. This is where you can pinch and curve the half inch border of the tray as desired. Let the slab dry and take its shape until it is leather hard.

Once leather hard, it is time to give your tray a foot. Roll some clay into a coil which is as thick as your index finger. Attach the two ends of the coil together to make an oval. Attach this coil by slipping and scoring to the bottom of the tray for it to stand still. Turn the tray over after the coil is leather hard and can hold the weight of the tray.

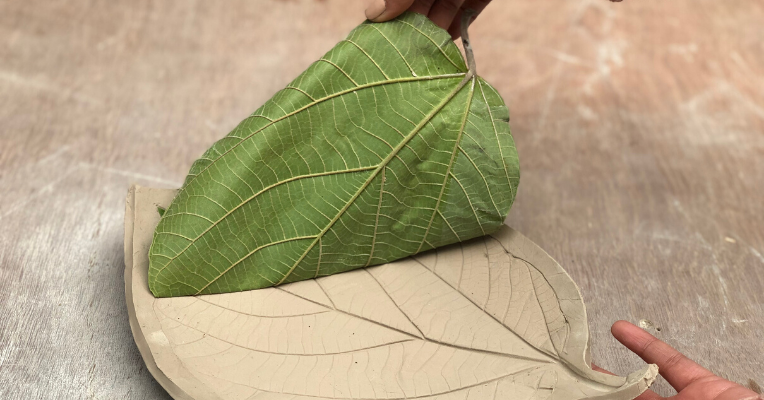
Now for the most exciting part, peel off the leaf gently from the top to reveal the pattern on your tray.

Finally, finish the tray by smoothing out the edges of the tray with a wet sponge. Sign the tray with your name and date or however you prefer. Wrap up the tray in plastic and let it dry slowly for it to go into the kiln!

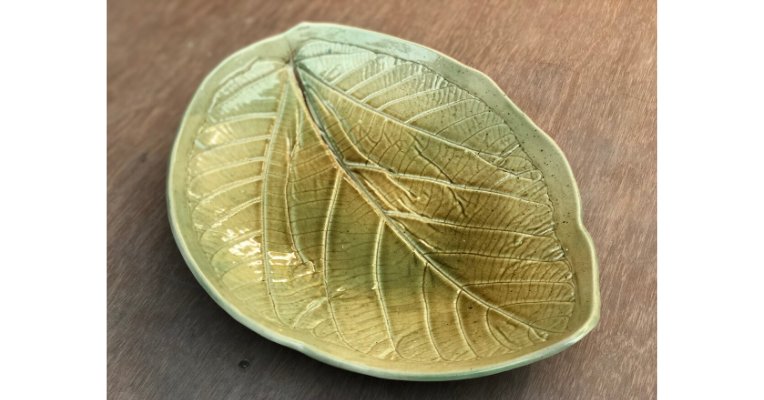
Here is our final finished tray. We used a green glossy glaze to resemble the color of the leaves, to look as natural as it can. But, nothing does it better than nature!
Like this tutorial? Don’t forget to Pin it!
