

I’m convinced coffee can fix almost everything. And what better way to have coffee than in your own, hand-crafted, ceramic coffee mug. Life doesn’t get better than that. Let me show you how we make your favorite coffee mug at Aura!
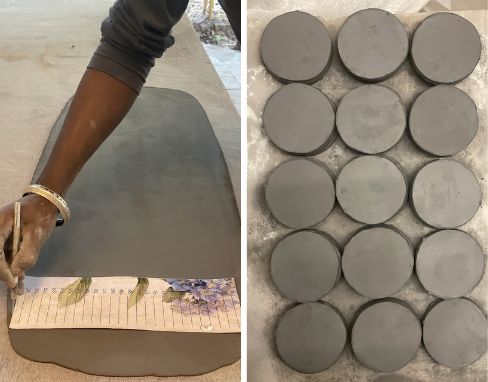
Working by hand is generally easier to master than using a potter’s wheel. For this particular design, we use a slab of clay. Slab building allows you to make pottery – including mugs and pitchers – with clean lines. For this, you will have to roll out a slab of clay, with a thickness of about 6mm and cut out a template for the mug.
For a uniformly cylindrical mug, it is best to start with a circular floor. The easiest way to achieve this is to use a template of a circle. The mug wall will be attached around the floor, so make the circle big enough to get the desired interior diameter of the mug. For making the walls of the mug, we need to cut out a rectangle from the same slab. The rectangle’s length should be slightly longer than the circumference of the mug floor, and its width should equal the desired mug height.
Keep the base slab on a turntable so it is easier for you to turn your piece around while building it. Scoring follows next. Scoring involves scratching hatch marks on the clay as it enables joining clay pieces together. This is done before brushing the slip around the periphery of the floor, plus around one long side and opposite short sides of the wall. Slip and score in pottery is a technique without which you cannot join two pieces together.
The next step is to attach the wall to the floor. And subsequently attach the sides to each other to create the cylindrical shape of the mug’s body. Weld (press) all of the joints together, both on the exterior and the interior of the mug and voila! your mug’s basic form is in place.
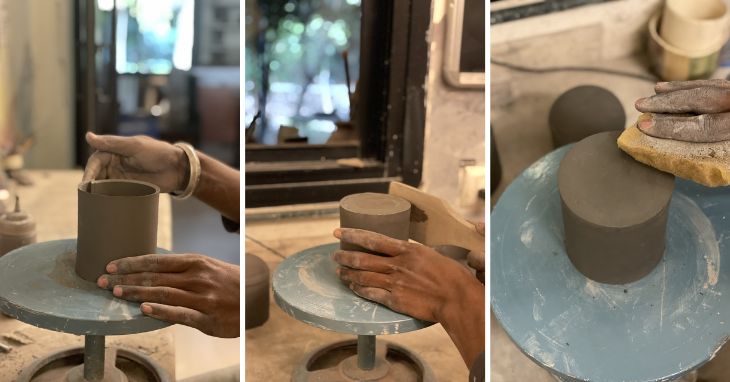
After the attachments are done, now is the time to shape your mug from all around. Keep turning the wheel as you mold the mug with your hands to lend it uniformity in shape. Smooth out both the outside and the inside surface of the mug by rubbing it gently with a wet sponge, gliding it over the surface. And, remember to smooth out the rim as well to avoid any rough areas to drink from.
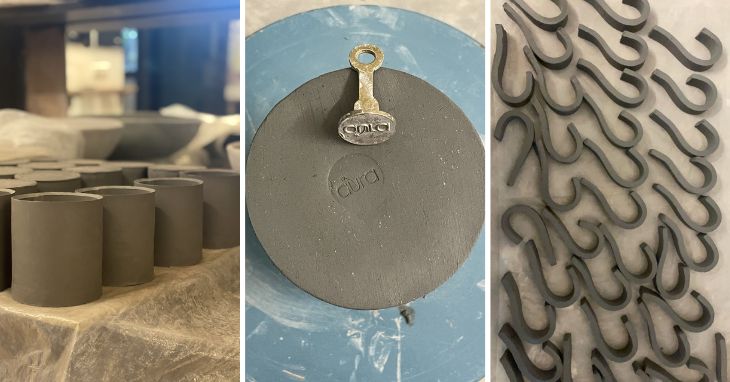
Measure and cut out a slab that is the desired length and width of your handle, taking into account that it will shrink slightly when dried and fired. Score and slip the two edges of the handle that you will be attaching to the mug. Now, score and slip the surface of the mug where you will be attaching the handle. Gently hold the mug and press the handle into the scored surfaces and attach. Clean out the squeezed out slip from the sides and smoothen the handle all over with a wet sponge.

Once your mug is bone dry, it is time to convert it from clay to ceramic ware with a bisque firing. After it is bisqued, glaze the mug with a food-safe glaze and fire again.
Ah, I can already smell the coffee!